VCA Canada Enable PXE for ThinStation on HP Elite Mini 600 G9
Objective
These instructions will show you how to disable M.2 booting and enable PXE booting.
MAC Address Location
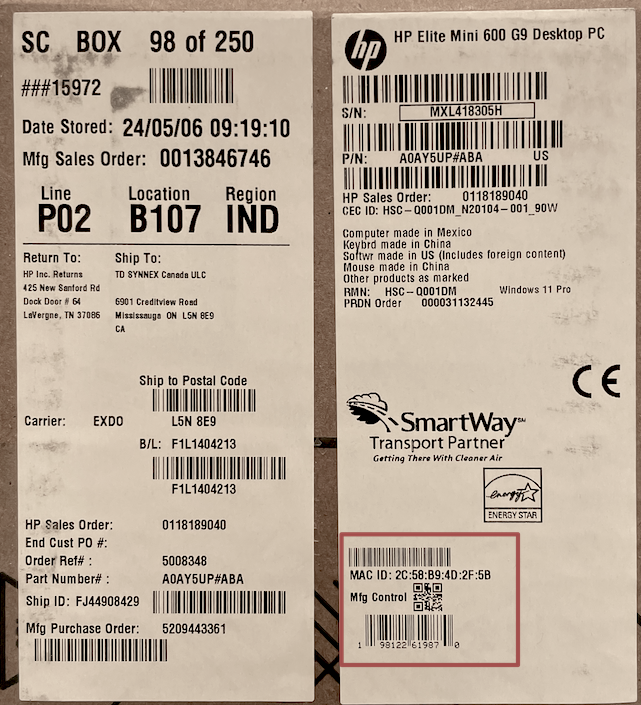
The MAC address for the Elite Mini 600 is not printed on the physical device, but it is printed on the package label, located on the end of the box. Use the MAC address listed on that label in the next step.

Print off Thin Client label
Before you PXE enable the thin client, you need to print off the label for the thin client. We use 2” by 4” labels. You can use this link to access the label generator.
PXE enable Thin Client
After 15-20 seconds the Smartsheet is saved, our DHCP server is automatically updated, so we’re ready to PXE enable the thin client. After this is complete, it should load up ThinStation, our Linux OS.
- Reboot thin client, and keep pressing F10 until you end up in the HP Setup Utility
- Choose Advanced -> System Options
- Set “M.2 SSD 1” and M.2 SSD 2” to unchecked
- Choose Security -> Secure Boot Configuration
- Press F10 to continue
- Set “Secure Boot” to unchecked
- Choose Security
- Uncheck “Intel Trusted Execution Technology”
- Choose Advanced -> Boot Options
- Ensure that the network controller is the only option in the boot order; move it to the top of the list if it is not already
- Choose File -> Save Changes and Exit (say yes you’re sure when prompted)
- Upon reboot, the device will prompt to confirm that the secure boot config change is expected, confirm it by entering the code listed on the screen and allow it to reboot